
Soundlessly, it begins... then, the meteor falling from the sky, and the crash...
Huh? You know what? I don't want that in my hack. Not a bit. I'll bet more than a few of you have shared that sentiment at one time or another. ...but, such a thing like changing the beginning of the game isn't possible - is it? Oh yeah, it's possible. More so than you think, actually! There are lots of misconceptions and misunderstandings we've cleared up about the game's introduction in recent days. Now, I pass these discoveries on to you. There's a LOT of information to go through here, but it should be pretty helpful to you!
- All I want to do is change the text...
Okay, easy enough. To do this, you'll need a hex editor and a table file to work with. Both are available on the PK Hack downloads page. There are two things we'll have to edit, so let's get to work!
* Another text system! -_-;
If you've ever worked with the main EB text system, you know about control codes - the letter and number combinations that float around the text, doing stuff. They can be a major hurdle for prospective hackers to face, simply because of how many there are. Well, guess what? In order to hack this text, you'll have to learn a COMPLETELY NEW text format! :D :D X| No worries, though, it's much easier than it might seem at first glance. First off, there are only a handful of meaningful control codes. Insert them into your text to achieve the following effects...
•[01 XX]: Move the text over a distance noted by XX.
•[02 XX]: Move the text down a distance noted by XX.
•[08 XX]: Print a main character name. Values are 01 - 04.
•[09]: Drop down one line.
See? Simple enough. So, let's write a quick sentence. Say, instead of "The year is 199X", we want "Bob likes tacos!" to appear in the lower right-hand corner. Hop in your hex editor and go to 0x210D86. This will take us to the very beginning of the line we want to edit.
[02 0C 01 32]The year is 199X[09 00 02]
So, to start, we have [02 0C], moving the text start point down the screen. Increase the XX value (0x0C) by 0x01, and it'll move down one line. A value of 0x00 will be at the top, and 0x18 will be at the bottom. 0x0C is dead-center. However, if you input a number that's too big, the text will wrap back around to the top.
Next up is the [01 32]. The values here are a bit more ambiguous. What you want to use for this depends partially on where you want your text to be aligned, and how long it is. It'll take a good bit of trial and error on your part to get it just how you want it. 0x60 will start your text about halfway across the screen, though. So, let's change the formatting bytes to get our text to the bottom-right. [18 01 7B] should do the trick... Then, simply rewrite the text with "Bob likes tacos!" (*Gasp* That takes up the same amount of space as the original text! How convenient! ^_^) Save those changes and check it out!
Congratulations, you've just finished hacking the text of one of the flyover arcs! :D But don't get too excited, there's a lot more that you can do than just this...
* But what if my text is longer or shorter than this?
This is something we just had to live with for a long time... but now you don't have to! :D So, how do you do this wondrous task of making text blocks bigger and better? Easy. Step 1 - write your blocks! For good measure, let's insert a couple more...
[02 18 01 7B]Bob likes tacos![09 00] <-- We have this already.
[02 02 01 00]No, I mean it. He's obsessed with 'em.[09 00]
[02 19 01 00]This isn't Bob's house.[09 00]
Obviously things are going to be a bit interesting now... heck, it even hangs over into the Winters flyover text. Hope you weren't planning to use that. :P Now, let's find out the addresses where each text block begins. Assuming you started at 0x210D86, the addresses should be:
#1 - 0x210D86
#2 - 0x210D9C
#3 - 0x210DC9
All right, so now we know where they are. So what, you might ask? Well, we're getting there. Hop over to 0x4A0A4. This block of code stores the addresses of these flyover text things. So, how do we change 'em? Easy! First, convert the adresses we have into SNES format! Open up a scientific calculator (you have one with Windows :P) and add 0xBFFE00 to all of the addresses. Then insert them into the ROM in reverse byte order.
#1 - 0x210D86 + 0xBFFE00 = 0xE10B86 = 86 0B E1 00
#2 - 0x210D9C + 0xBFFE00 = 0xE10B9C = 9C 0B E1 00
#3 - 0x210DC9 + 0xBFFE00 = 0xE10BC9 = C9 0B E1 00
The first two should look familiar - they're what's already there! That makes sense, though, considering the first block was the same size as the original (thus its starting point and the starting point of the next one remain the same). So, change the third pointer to our address, and voilá! Save your changes and enjoy the show.
- Going above and beyond...
Editing the text is great, but what if you didn't want to be in Onett at ALL in the beginning of the game? Or what if you wanted to do something completely different? Well, let's take a look and cover some of the more useful things you can do.
* The State of the Beginning Game
When the game starts, there are a few conditions that may affect how you construct your new intro sequence - some more important than others.
1) No event flags are set. Also, there is no way to set them prior to the beginning of the game - so, there's no way to immediately start with Onett in a state of daylight through the text. You'll actually have to modify the pallet itself...
2) No people or items are present. Anywhere. At all. Only object-type TPT entries remain. This was one of the mysterious things that confused us for some time. However, we have isolated the toggling on of the other entries to one of the movement arcs in the flyover. (More on that later.)
3) Ness is the only member of your party.
4) Starting equipment and other stats are dependent upon a data table in the game.
5) There is no spoon. Sorry.
* Changing Starting Coordinates
To do this takes a tiny bit of work, but nothing you can't handle. For a start, we'll need to know where you want to begin the game. Specifically, we'll need the coordinates. Open up your map editor and use the seek function in the door destination editor to find out where you're going. Let's say, just for yuks, our coordinates are x:528 y:117. Now, take note - the coordinates the seek function gives are in an 8-pixels-per-unit format. However, starting coordinates are stored in 1-pixel-per-unit format! :o Easy enough, just go ahead and multiply your values by 8 each (and convert them to hex, of course).
X:528 * 8 = 4224 = 0x1080 = 80 10
Y:117 * 8 = 936 = 0x03A8 = A8 03
Now that we have the coordinates, we can insert them into the game. The coordinates are stored at 0x2009A - first the Y coordinate, and then the X coordinate. Do not edit the A2 or A9 bytes, as these are part of the code that makes the game work... [A2 A8 03 A9 80 10] is what you should come up with. Now, don't start anything yet! The game isn't going to like being somewhere else when it tries to sweep across Onett. Let's move on to some stuff that's a little more advanced.
* The Flyover itself
The flyover is a block of text code chock full of movement craziness that we don't understand much about. We have, however, figured out enough to allow you to edit the sequence meaningfully. Shall we begin? For starters, open up the text editor and enter Raw Text mode. To get to the text block in question, run a search for 1F 21 0A.
So, here we are. (View this file for reference.) Each of the control codes in question has a specific function in the game, all contributing to the totality of the flyover sequence. Each of the codes has its own unique function, which should be made clear at in that file. Now, one important thing to remember is that the movement codes require particular codes around them in order to not cause death and pain.
This code sequence, in the simplest terms, engages the final flyover arc leading up to Ness' house. It's made up of three individual things. First, we have the [1F 21 97] code, which teleports you to to the starting location. This is important, because the movement pattern is location-specific; try to use it anywhere but at the teleport's location, and the game will explode. Next, the [1F 15 6A 00 DE 01 01] code activates the third flyover arc (pattern 0x1DE), which includes the fade to black and the text "Ness' House." Lastly, the [08 B8 B4 C9 00] links to an the address $C9B4B8 to execute some more codes. I won't break them down here, as we're not sure what they do individually - suffice it to say that they just work. :P
This particular block of codes is technically the only thing you even need in the flyover. Why's it so important? Simple. If you don't run through that movement pattern at least once, no people or item boxes will appear anywhere in the game. Terrific, huh? It's a lonely world without anybody to talk to, so you'll want to include this. You don't neccessarily have to have this in the INTRO, but you'll probably want to. And on top of that, the movement code is dependent on that location - try to use it anywhere else, and it'll just plain explode. You basically have 3 options:
* Movement Hacking: The Grand Finale
At the time of this writing, we're only just barely scratching the surface of what's possible with the game's movement control system. Still, we know enough to put it to a few practical uses. One of these is getting the flyover to obey your whims. We'll have to put to use a lot of the stuff we covered before, so hold on to your hats, and let's get to work!
There are a few steps we're going to have to take to prepare... We're going to need four coordinate points. Three of them will be used as starting positions; one for each movement arc. However, while the first two arcs simply have a starting location and a direction programmed in, the third arc uses a second coordinate point as a destination. So, let's find our coordinates!
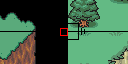 |  |
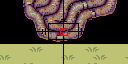
| 767, 34 (Cave of the Past, Present Day) | 74, 844 (Cave of the Past, The Past) |
 | 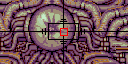 |
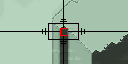
| 529, 254 (The Devil's Machine, Entrance) | 529, 109 (The Devil's Machine, Giygas) |
So, here we are. As with the starting coordinate entry, we'll have to convert these into 1-pixel-per-unit format. To save on the amount of typing I have to do (^_^;) I've converted all of the coordinates and put them out here for your reference.
| Standard | 8-ppu, Hex | 1-ppu, Hex |
| 767, 34 | 2FF, 22 | 17F8, 110 |
| 74, 844 | 4A, 34C | 250, 1A60 |
| 529, 254 | 211, FE | 1088, 7F0 |
| 529, 109 | 211, 6D | 1088, 368 |
So, now that we have these, what good are they, you ask? Well, we'll have to modify three data locations for each of the flyover arcs. Let's take a look, and get started with the first arc.
The first place we have to modify data is in the starting coordinates for the game, being as this is the place we begin. Easy enough - we're just going to insert the first coordinates we have (in 1-pixel-per-unit format) at 0x2009A, as we did a few sections ago. This will modify where Ness first appears at the start of the game. The result should appear as [A2 10 01 A9 F8 17]. Next up, though, is something you've probably never seen before.
Go to 0x3ADED in your hex editor. This puts us at the beginning of our first movement pattern. You've probably never seen anything like this before. Much like the text control codes, this movement stuff is made up of a language all it's own... a scary language, complete with pointers directly to the graphics drawing routines and SNES hardware. :D Don't worry, though, I'll point you right where you need to go. Notice at the beginning, you'll see [28 24 08 29 E8 06]. This stores the starting coordinates for the movement pattern. [28 XX XX] loads the X coordinates, and [29 XX XX] loads the Y coordinates. Plugging in our first coordinates again, we should get [28 F8 17 29 10 01].
Next up is the direction of travel. In these first two movement arcs, you simply travel in one of eight possible directions - the 8 cardinal points. Each one is assigned a value from 00 to 07. North is 00, Northeast is 01, East is 02, Southeast is 03, South is 04, Southwest is 05, West is 06, and Northwest is 07. In the ROM at 0x3AE05, you'll find the movement control code [1D 07 00]. Simply replace the 07 with any of the above values to set the direction of movement for that arc. In this case, we're going to want to go west, so change it to 06.
The next arc is almost the same. The only difference lies in the first step... rather than modifying starting coordinates, we'll be editing one of the entries used by the [1F 21 XX] teleport code. You may wish to reference this file. So, pop over to 0x15F25B, the data entry for teleport 0x96. You'll see the bytes [FA 00 B2 00], the coordinates you will teleport to. Note that in the teleport entries, coordinates are stored in the standard 8-pixels-per-unit format. So, taking the normal coordinates in hex, we get [4A 00 4C 03]. Following that, we must enter 1-pixel-per-bit coordinates at 0x3AE27 (becoming [28 50 02 29 60 1A]) and change the movement direction at 0x3AE54 (changing [1D 01 00] to [1D 07 00]).
That takes care of the first two arcs. Only one more to go! :D Our first destination is Teleport 0x97, which teleports you to the start location of the third arc. Again, at 0x15F263 this time, we'll insert in 8-pixel-per-unit format, thus getting [11 02 FE 00]. Next, pop in the starting coordinates for the movement pattern at 0x3AE61. Like before, it's in 1-pixel-per-unit format, so we'll get [28 88 10 29 F0 07]. Now, for the destination, we'll find yet another new formatting type. Take a look at 0x3AE83, and you'll find [0E 06 68 0A 0E 07 50 01]. The X coordinates are logged in with [0E 06 XX XX], and the Y coordinates with [0E 07 XX XX]. Thus, plugging in our destination coordinates, we'll get [0E 06 88 10 0E 07 68 03]. Now, save your changes and take a look. With all of that done, you should have an entirely different flyover sequence on your hands that works perfectly!
So, to review... Here are all of the data locations you must edit to change the movements of the flyover.
Coordinate Set 1:
0x2009A - Starting Coordinates, Game (1 px-unit)
0x3ADED - Starting Coordinates, Movement Pattern 1 (1 px-unit)
0x3AE06 - Movement Direction, Pattern 1
Coordinate Set 2
0x15F25B - Destination of Teleport 0x96 (8 px-unit)
0x3AE27 - Starting Coordinates, Movement Pattern 2 (1 px-unit)
0x3AE54 - Movement Direction, Pattern 2
Coordinate Sets 3/4
0x15F263 - Destination of Teleport 0x97 (8 px-unit)
0x3AE61 - Starting Coordinates, Movement Pattern 3 (1 px-unit)
0x3AE83 - Destination Coordinates, Movement Pattern 3 (1 px-unit)